Set up Gmail to auto-forward emails from specific senders easily.
By the way, we're Bardeen, we build a free AI Agent for doing repetitive tasks.
If you manage emails, check out Bardeen's AI-driven email automation. It forwards emails with specific keywords, saving you time.
Tired of manually forwarding emails from important senders? Discover the power of automating this process in Gmail! In this comprehensive guide, we'll walk you through the step-by-step process of setting up automatic email forwarding for specific senders, saving you time and effort in managing your inbox.
By mastering this essential skill, you'll streamline your email management, ensure critical messages reach the right destination, and never miss an important email again. Whether you're a busy professional, a student, or simply looking to optimize your email workflow, this guide has you covered.
Get ready to take control of your Gmail inbox like a pro! We'll explore both the classic manual method and introduce you to Bardeen, a game-changing tool that simplifies the process even further. So, let's dive in and unlock the secrets of automatic email forwarding in Gmail!
Email forwarding is a powerful feature that allows you to redirect incoming emails from one email address to another automatically. This functionality is particularly useful when you need to manage multiple email accounts or want to organize your inbox with AI and ensure that important messages from specific senders reach the right destination.
Automatic email forwarding proves invaluable in various scenarios. For instance, if you're a business owner, you might want to forward all emails from key clients or partners to your personal email address, ensuring you never miss critical communications. Similarly, if you're managing a team, you can set up forwarding rules to distribute incoming emails to the appropriate team members based on the sender's address.
In personal email management, automatic forwarding can help you sort and organize your inbox more efficiently. By forwarding emails from specific senders to designated folders or labels, you can keep your main inbox clutter-free and easily locate important messages when needed.
To better understand the practical applications of email forwarding, let's consider a few real-life examples:
By implementing automatic email forwarding, both Sarah and Michael streamline their email management processes, saving time and reducing the risk of overlooking important messages.
In the next section, we'll guide you through the step-by-step process of setting up Gmail for automatic forwarding, empowering you to automate your email process and make the most of this valuable feature.
Setting up automatic email forwarding in Gmail is a straightforward process that can save you time and ensure important messages are always delivered to the right place. By following a few simple steps, you can configure your Gmail account to forward incoming emails to another email address, either for all messages or based on specific criteria.
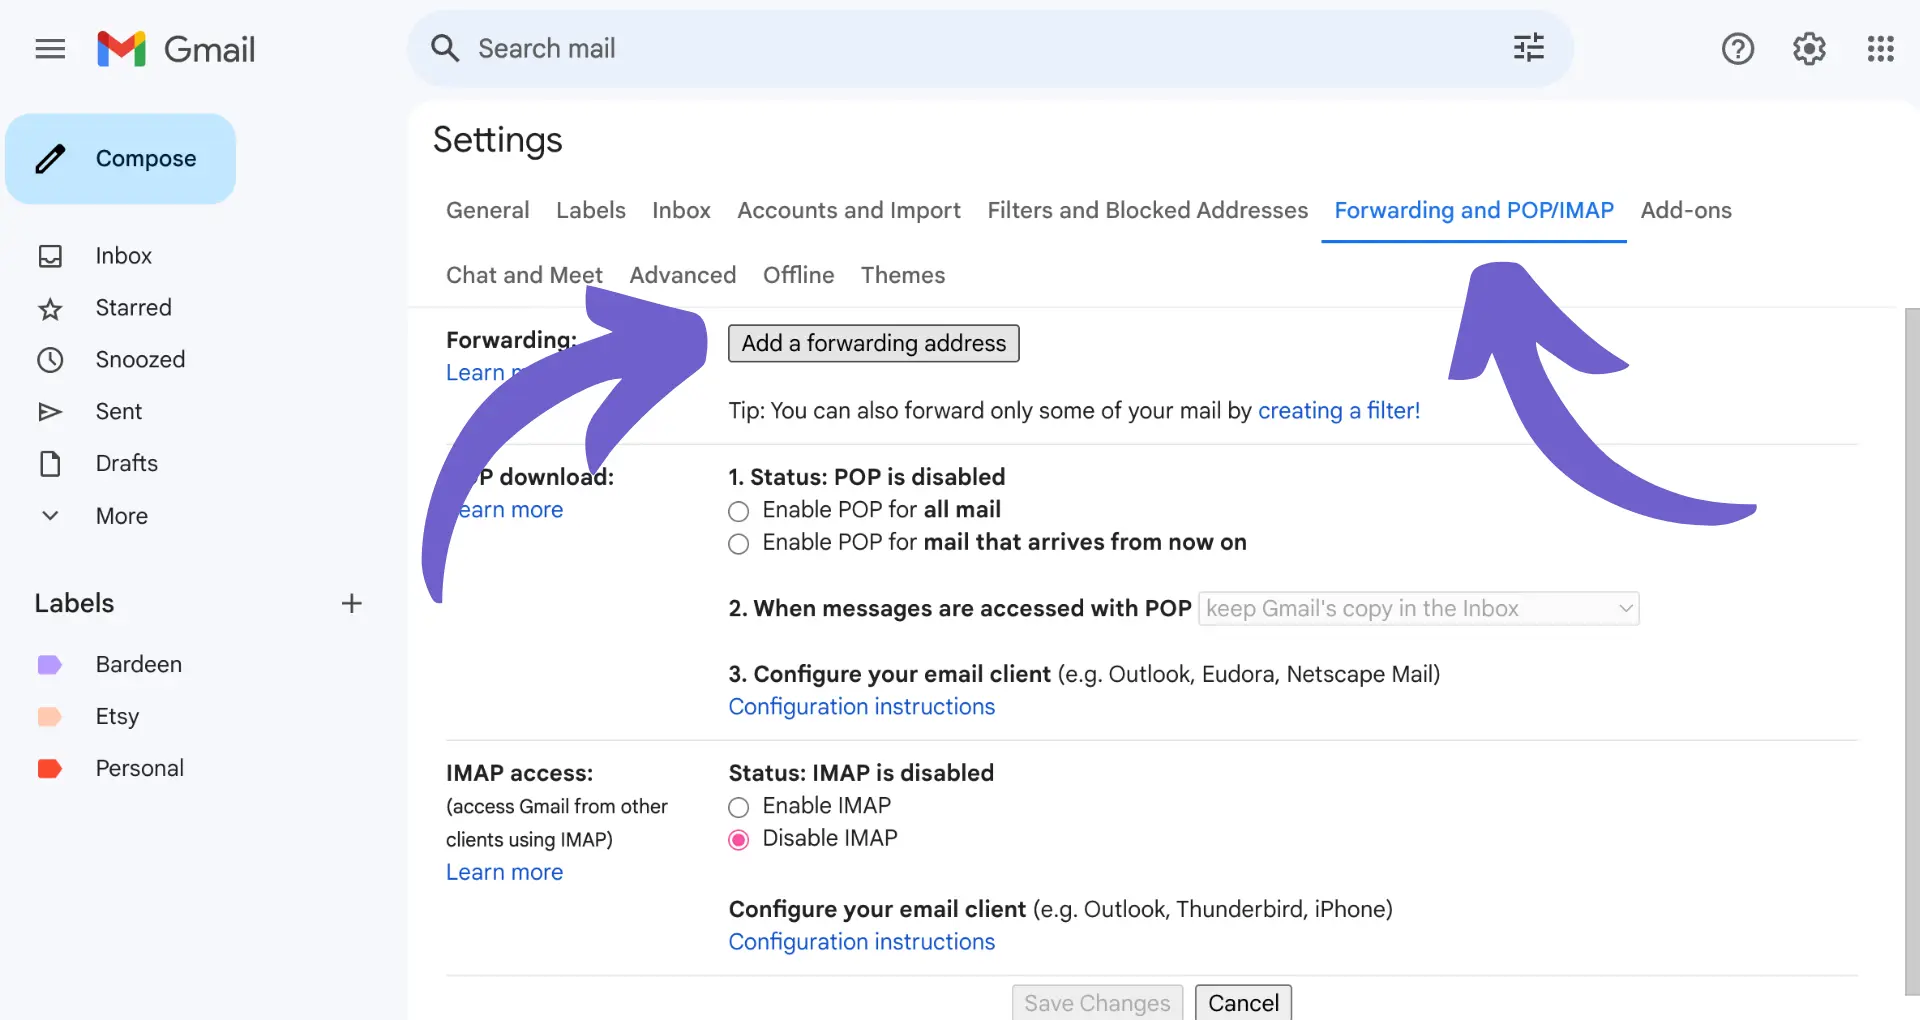
To get started, log in to your Gmail account and navigate to the settings menu. Click on the gear icon in the upper right corner of the screen and select "See all settings" from the dropdown menu. In the settings window, click on the "Forwarding and POP/IMAP" tab to access the email forwarding options.

From here, you can choose to forward all incoming emails to another email address or set up filters to forward only specific messages based on criteria like the sender, subject, or keywords.
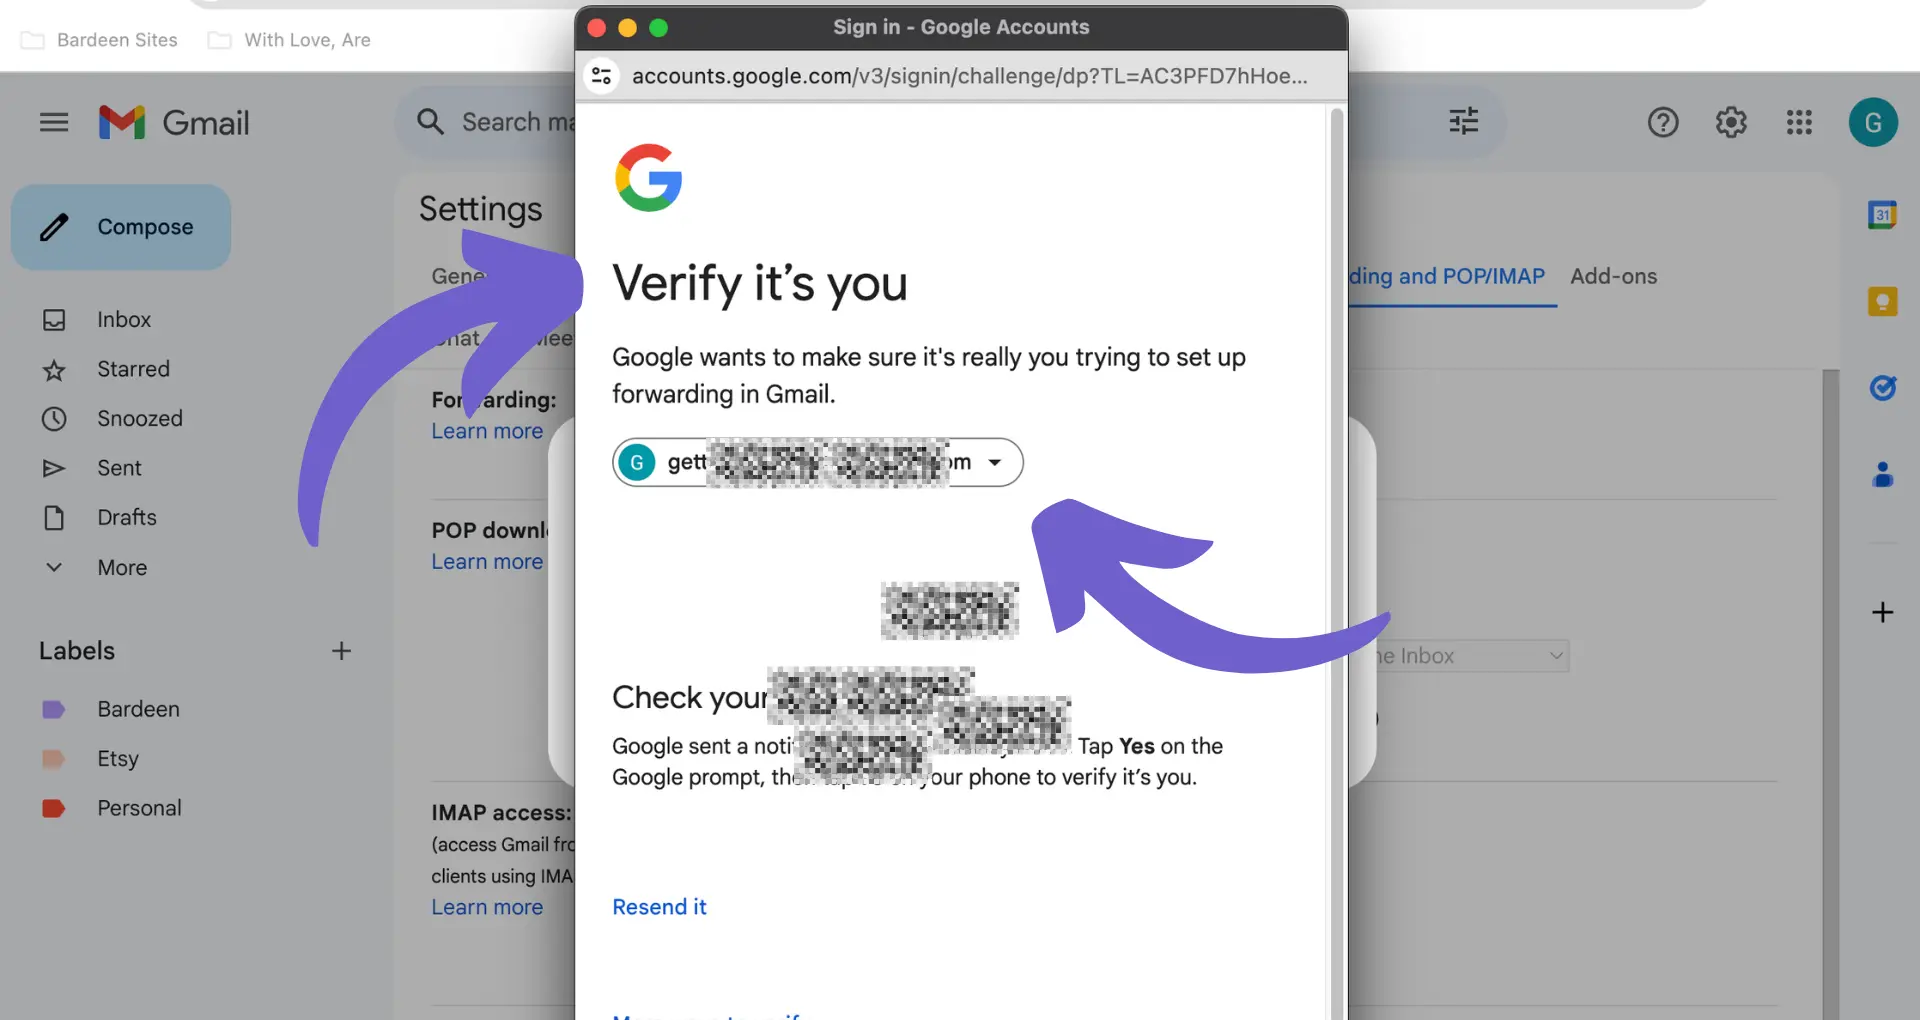
Before you can start forwarding emails, Gmail requires you to verify the email address you want to forward messages to. This security measure ensures that you have access to the forwarding address and helps prevent unauthorized forwarding.
To verify the forwarding address, click on the "Add a forwarding address" button in the forwarding settings. Enter the email address you want to forward messages to and click "Next." Gmail will send a verification email to the forwarding address with a confirmation link. Click on the link to verify the address and enable forwarding.
Once you've verified the forwarding address, you can choose whether to keep a copy of the forwarded messages in your Gmail inbox or archive them. You can also decide whether to forward messages marked as spam or only forward messages that meet specific criteria.
By setting up automatic email forwarding in Gmail, you can ensure that important messages are always delivered to the right place, even if you're not actively monitoring your Gmail inbox. In the next section, we'll explore how to create filters that forward emails from specific senders, giving you even greater control over your email management.
Save time by using Bardeen's AI-driven email automation. Automatically forward emails with specific keywords in the subject line and focus on important tasks.
Creating filters in Gmail allows you to automatically forward emails automatically from specific senders to another email address, keeping your primary inbox organized and clutter-free. By using search operators, you can accurately identify emails from particular senders and set up specialized forwarding rules. In this section, we'll explain how to create filters that target emails from specific senders and provide instructions on using search operators to refine your filtering criteria.
To create a filter for a specific sender in Gmail, start by clicking the down arrow in the search bar at the top of your inbox. In the "From" field, enter the email address of the sender you want to filter. You can also use search operators like "from:(@domain.com)" to filter emails from an entire domain.
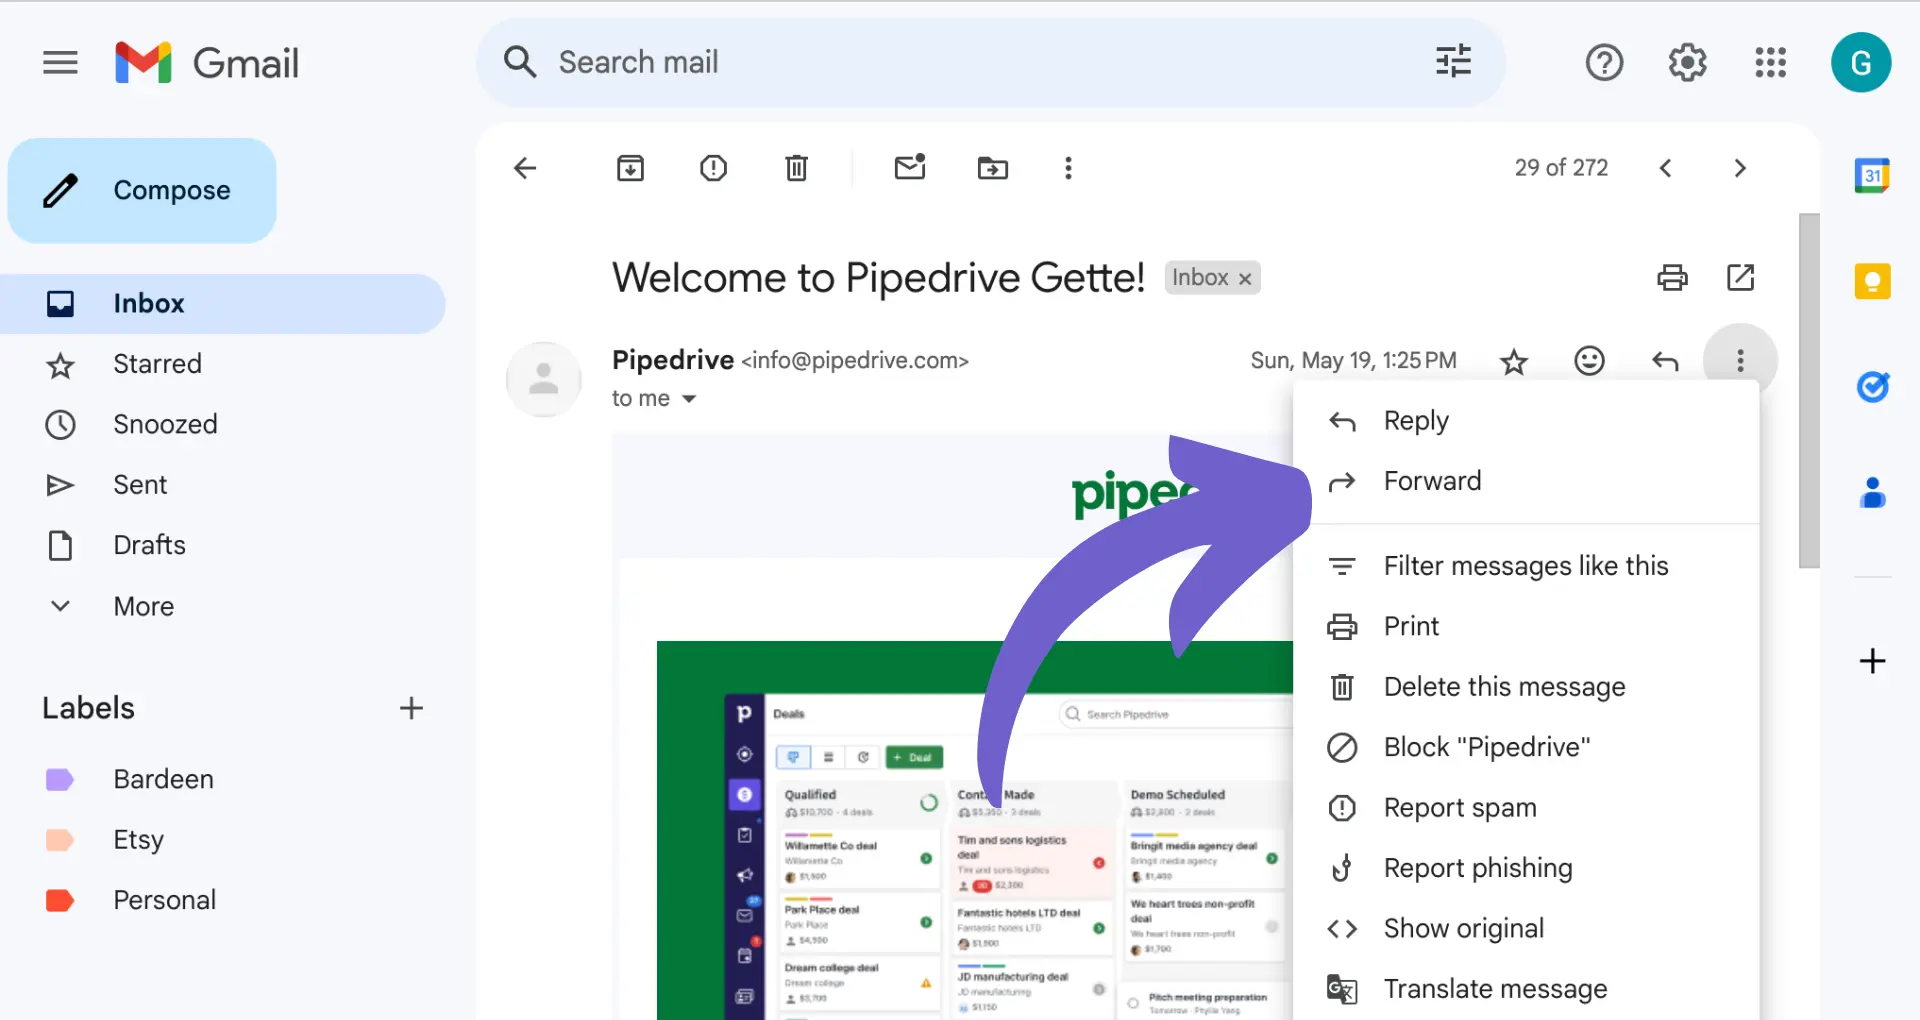
Once you've entered the sender's email address, click "Create filter" at the bottom of the search window. On the next screen, you can choose what actions you want Gmail to take when it receives an email from that sender. To forward the email automatically, select "Forward it to" and enter the desired forwarding address.
After selecting your preferred actions, click "Create filter" to save your new filtering rule. From now on, any emails from the specified sender will be automatically forwarded to the designated email address.
Gmail's search operators allow you to create more precise filters by targeting specific senders or email characteristics. For example, you can use the "from:" operator followed by a name or email address to filter emails from a particular sender. If you want to filter emails from multiple senders, you can use the "OR" operator, like this: "from:sender1@example.com OR from:sender2@example.com".
Other useful search operators include "subject:" to filter emails based on keywords in the subject line, "has:attachment" to filter emails with attachments, and "before:" or "after:" to filter emails by date. By combining these search operators, you can create highly targeted filters that forward only the most relevant emails to your designated address.
Learning how to create filters for specific senders in Gmail and using search operators to refine your filtering criteria are essential skills for managing your inbox effectively. By automatically forwarding emails from important senders to a separate address, you can ensure that critical messages never get lost in the clutter. Next, we'll explore how to manage and test your email forwarding rules to ensure they're working as intended.
Save time with Bardeen's AI-driven email automation. Focus on important work while automating repetitive tasks.
Once you've set up email forwarding rules in Gmail, it's crucial to manage and test them regularly to ensure they're working as expected. This involves sending test emails to verify that messages are being forwarded correctly and troubleshooting any issues that may arise. Additionally, when managing multiple forwarding rules, it's important to prioritize them based on their importance and relevance to your workflow with AI.
Testing your email forwarding rules is essential to ensure that important messages are being delivered to the right place. To do this, send a test email from the specific sender you've set up a forwarding rule for to your primary Gmail address. Then, check the forwarding address to confirm that the email has been successfully forwarded.
If the test email doesn't appear in the forwarding address inbox, double-check your forwarding rule settings to make sure they're correctly configured. You may also want to check your spam or junk mail folders to see if the forwarded email has been mistakenly filtered.
When you have multiple forwarding rules set up in Gmail, it's important to manage them effectively to avoid confusion and ensure that emails are being forwarded to the right places. One way to do this is by prioritizing your forwarding rules based on their importance.
For example, if you have a forwarding rule set up for your boss's emails, you may want to give that rule top priority to ensure you never miss an important message. You can do this by placing that forwarding rule at the top of your list of filters in Gmail.
If you encounter any issues with your forwarding rules, such as emails not being forwarded correctly or forwarded emails ending up in spam folders, try troubleshooting by reviewing your rule settings and making any necessary adjustments. You may also want to reach out to the recipient's email provider to ensure that forwarded emails are not being blocked or filtered on their end.
Testing and managing your email forwarding rules in Gmail is crucial for maintaining an organized and efficient inbox. By regularly verifying that your rules are working as intended and prioritizing them based on importance, you can ensure that important messages always reach their intended destination. In the next section, we'll explore some advanced tips and considerations for email forwarding in Gmail.
When setting up email forwarding in Gmail, it's important to consider the potential security risks and limitations of this feature. By understanding these implications and taking appropriate measures, you can ensure that your forwarded emails are secure and delivered as intended. Additionally, being aware of Gmail's forwarding limitations can help you manage your expectations and plan accordingly.
Email forwarding can potentially expose your emails to security risks, such as unauthorized access or interception. If your forwarding address is compromised, an attacker could gain access to all the emails being forwarded to that address.
To mitigate these risks, ensure that your forwarding address is secured with a strong password and two-factor authentication. Additionally, be cautious when forwarding sensitive information, such as financial data or personal details, and consider using encryption for added protection.
While Gmail's email forwarding feature is robust, it does have some limitations. For example, Gmail has a cap on the number of emails that can be automatically forwarded per day to prevent abuse and protect against spam.
If you exceed this limit, your forwarded emails may be delayed or not delivered at all. To avoid hitting this cap, consider setting up filters to forward only important emails or use a third-party forwarding service that can handle a higher volume of messages.
Another limitation to keep in mind is that Gmail may have difficulty forwarding emails with large attachments. If you regularly receive emails with sizeable attachments, it's best to use an alternative method, such as downloading the attachments directly from the original email.
By understanding the security implications and limitations of email forwarding in Gmail, you can take proactive steps to protect your emails and ensure they reach their intended destination. Regularly monitoring your forwarding rules and making adjustments as needed can help you maintain a secure and efficient email management system.
Save time with Bardeen's AI-driven email automation. Focus on important tasks while automating repetitive email management processes.
Knowing how to automatically forward emails from a specific sender in Gmail is crucial for staying organized and efficient in managing your inbox.
In this guide, you discovered:
With these skills, you'll be a master at automatically forwarding emails faster than you can say "inbox zero"!


SOC 2 Type II, GDPR and CASA Tier 2 and 3 certified — so you can automate with confidence at any scale.


