App Tutorial

Step-by-Step Guide to Sending Marketing Emails in HubSpot

author
Jason Gong
App automation expert
Apps used
HubSpot
LAST UPDATED
May 16, 2024
TL;DR

Sending a marketing email in HubSpot involves creating the email, customizing its settings, and choosing to send or schedule it. This process is streamlined through HubSpot's intuitive editors and settings options.

Understanding HubSpot's send limits is crucial for effective email marketing.

Streamline your HubSpot email marketing by automating tasks with Bardeen.

HubSpot's email editor is a powerful tool for creating and sending effective marketing emails. It offers a range of features designed to simplify the email creation process, personalize content, and optimize engagement. In this step-by-step guide, we'll walk you through how to use HubSpot's email editor to send marketing emails that drive results.

Introduction to HubSpot's Email Editor

HubSpot's email editor is a user-friendly tool designed to simplify the process of creating and managing email templates. It offers two options: the Classic Editor and the Drag-and-Drop Editor.

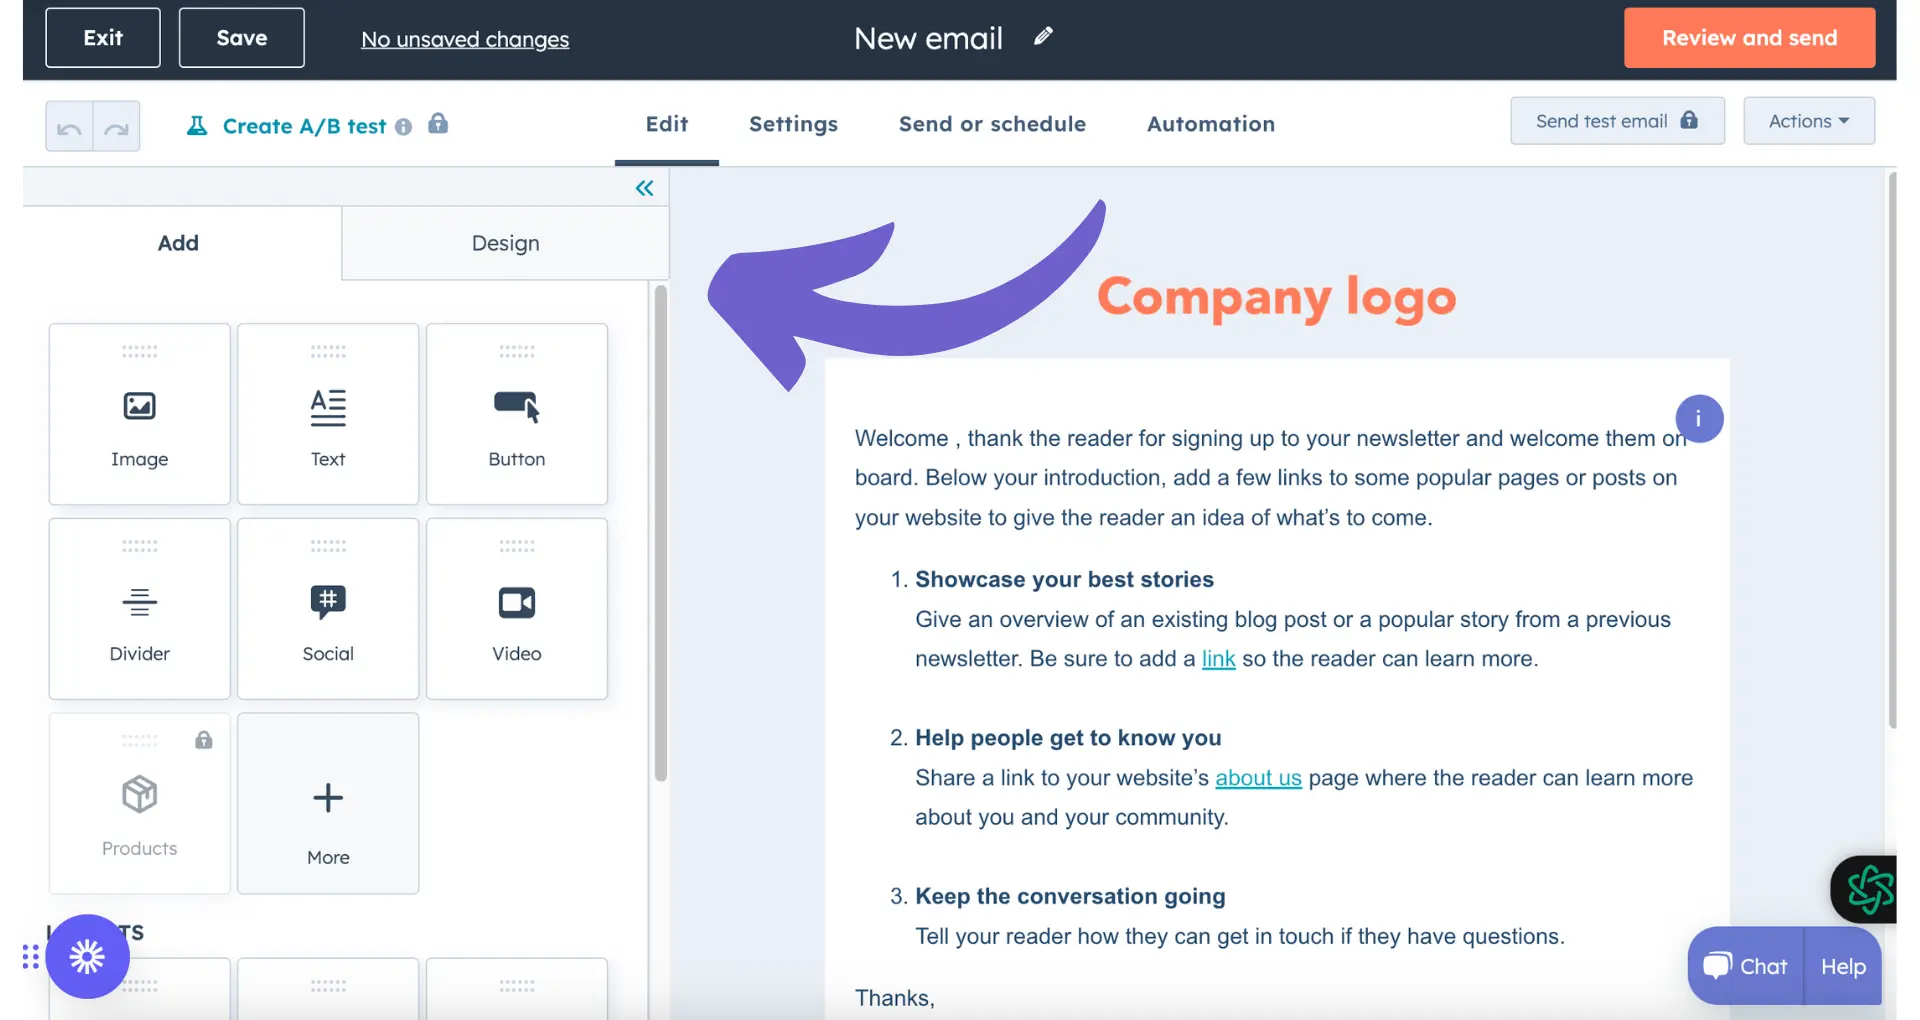
The Drag-and-Drop Editor provides an intuitive interface that allows you to easily customize your email layout and content without requiring HTML knowledge. With its drag-and-drop functionality, you can quickly add, remove, or rearrange elements like text, images, and buttons to create visually appealing emails.

The Classic Editor, on the other hand, is a more traditional HTML editor that gives you greater control over your email's code. It's suitable for users who are comfortable working with HTML and want to create highly personalized emails with AI assistance.

Both editors offer a range of features to enhance your email marketing automation efforts, such as:

  • Personalization tokens to tailor content to individual recipients
  • A/B testing to optimize engagement
  • Responsive design to ensure proper display across devices
  • Pre-built templates to save time and maintain consistency

By leveraging HubSpot's email editor, you can create targeted, engaging emails that drive results for your business.

Setting Up Your Email Campaign

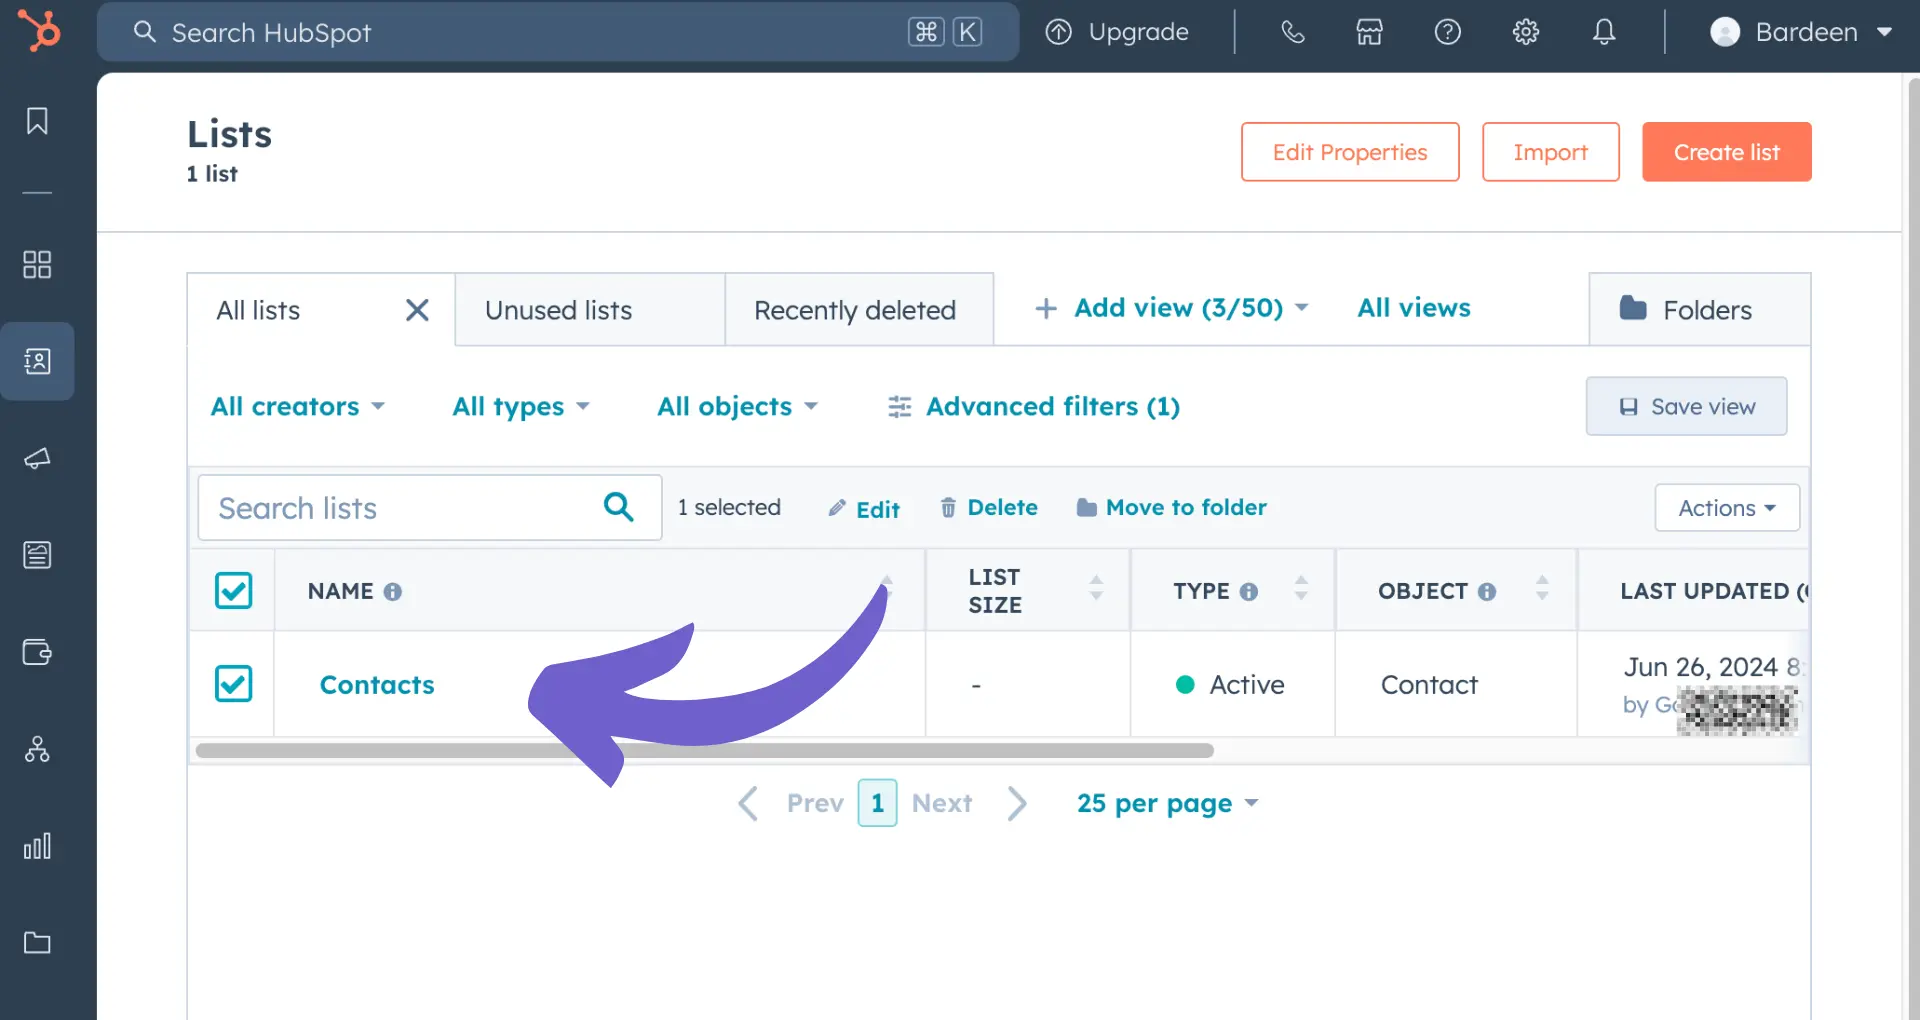
To create a new email campaign in HubSpot, navigate to Marketing > Marketing Email and click "Create email". Select the type of email you want to create:

  • Regular: a one-off personalized email sent to a segment of your HubSpot lists.
  • Automated: a personalized email configured to send to contacts when they meet specific workflow enrollment criteria.
  • Blog/RSS: an email automatically sent to blog or RSS subscribers when new content is published.

Choose an appropriate template based on the goal and content of your email. Aligning the email type with your marketing objectives is crucial for an effective campaign. For example:

  • Use regular emails for newsletters, announcements, or promotional offers.
  • Automated emails work well for lead nurturing, onboarding sequences, or triggered messages based on contact behavior.
  • Blog/RSS emails keep subscribers updated with your latest content and drive traffic to your website.

By selecting the right email type and template, you set a strong foundation for your HubSpot email campaign in Gmail.

Save time and focus on important tasks by automating your process with Bardeen's HubSpot playbook.

Personalizing Your Email Content

Personalization tokens allow you to tailor email content to individual recipients based on their contact properties in HubSpot's CRM. To add a personalization token:

  1. Place your cursor where you want the token in the email editor.
  2. Click the "Personalize" dropdown menu in the rich text toolbar.
  3. Select "Token" and choose a property from the dropdown menu.
  4. Set a default value for the token, which will display if the contact lacks a value for that property.
  5. Click "Insert" to add the token to your email.

Dynamic content blocks take personalization further by displaying different content variations to contacts based on specific criteria, such as lifecycle stage or list membership. Benefits of using dynamic content include:

  • Higher engagement rates by delivering more relevant, targeted content.
  • Streamlined email creation, as you can use one email to cover multiple segments.
  • Improved customer experience through content tailored to their interests and needs.

By leveraging personalization tokens and dynamic content blocks, you can create highly personalized emails that resonate with your audience and drive better results for your campaigns.

Designing and Editing Email Layouts

HubSpot's drag-and-drop email editor makes it easy to create visually appealing and responsive emails. Here's a step-by-step guide on adding and customizing content elements:

  1. In the email editor, click the "+" icon to open the content panel.
  2. Drag and drop the desired content element (e.g., text, image, CTA) into the email layout.
  3. Click on the element to reveal its editing options in the left panel.
  4. Customize the element's appearance using the available settings, such as font, color, alignment, and spacing.
  5. To resize an element, click and drag its edges or adjust its dimensions in the editing panel.
  6. Rearrange elements by dragging them to a new position within the layout.

When designing your email, keep these best practices in mind for responsive email design:

  • Use a single-column layout for better readability on mobile devices.
  • Keep your email width between 500-600 pixels to ensure proper display across most email clients.
  • Use a font size of at least 14px for body text and 20-30px for headings.
  • Optimize images for faster loading times and provide alt text for accessibility.
  • Place important information and CTAs above the fold to increase visibility and engagement.

By following these guidelines and leveraging HubSpot's email editor, you can create responsive and visually engaging emails that effectively communicate your message to your audience.

Boost your email productivity with AI assistance. Create draft emails for HubSpot contacts using OpenAI seamlessly with Bardeen's playbook.

Conducting A/B Testing to Optimize Engagement

A/B testing is a powerful tool in HubSpot that allows you to compare two versions of an email to determine which one performs better. Here's how to set up an A/B test in HubSpot:

  1. In the email editor, click "Create A/B test" to generate a variation of your email.
  2. Customize the variation by changing elements such as the subject line, content, or send time.
  3. Set the distribution percentage for each variation and the winning metric (e.g., open rate, click-through rate).
  4. Determine the test duration to gather sufficient data before selecting a winner.
  5. Send your test email and analyze the results in the email's performance dashboard.

Testing different email elements is crucial for optimizing engagement. Consider experimenting with:

  • Subject lines: Test variations in length, tone, or personalization to improve open rates.
  • Email content: Try different layouts, images, or copy to increase click-through rates.
  • Send times: Experiment with different days and times to find the optimal send window for your audience.

By conducting regular A/B tests and iterating based on the results, you can continuously refine your email marketing strategy and maximize engagement with your target audience.

Reviewing and Sending Your Email

Before hitting send, it's crucial to review your email to ensure it looks polished and professional. Here are the final steps:

  1. Preview your email on different devices (desktop and mobile) to check for formatting issues or broken elements.
  2. Send test emails to yourself and team members to view the email in various email clients and proofread the content.
  3. Double-check your subject line, preview text, sender name, and reply-to address in the email settings.
  4. Select your recipients by choosing the appropriate contact lists and excluding any necessary segments.
  5. Schedule your email to send at the optimal time, or send it immediately.

After sending, monitor your email analytics to gauge performance and make data-driven improvements for future campaigns. Key metrics to track include:

  • Open rate: the percentage of recipients who opened your email
  • Click-through rate: the percentage of recipients who clicked a link in your email
  • Unsubscribe rate: the percentage of recipients who opted out of future emails

By reviewing these metrics, you can identify areas for optimization, such as tweaking subject lines, adjusting send times, or improving your content and offers to better resonate with your audience.

Save time and focus on important tasks by automating your process with Bardeen's email reminder playbook.

Boost HubSpot Emails with Bardeen Automation

While manually sending a marketing email in HubSpot allows for a high level of customization and personalization, automating this process can save a significant amount of time, especially for recurring campaigns or follow-up sequences. By leveraging Bardeen's automation capabilities, you can streamline your email marketing efforts, ensuring timely and efficient communication with your audience.

  1. Create draft email for a HubSpot contact using OpenAI: This playbook automates the drafting of personalized emails to your HubSpot contacts, utilizing OpenAI to generate content based on your prompts, making your outreach efforts more efficient and personalized.
  2. Create a HubSpot ticket when an email is forwarded: Automate your customer service by creating HubSpot tickets from emails forwarded to a specific address, ensuring that every customer query is captured and addressed in a timely manner.
  3. Create a new HubSpot deal using OpenAI when a label is added to an email: Enhance your sales process by automatically creating deals in HubSpot when an email is labeled, utilizing OpenAI to generate deal names and ensuring a smooth transition from email communication to deal management.

Get started with these Bardeen automations to maximize your HubSpot email marketing strategy. Download the Bardeen app now.

Other answers for HubSpot

Top 70+ Sales Discovery Questions for 2024

Explore over 70 sales discovery questions to better understand prospects and qualify leads effectively. Boost your sales strategy now!

Read more
Understanding Sales Discovery Calls: A Guide

Learn what a sales discovery call is, its importance, and how it helps identify and understand prospect needs effectively.

Read more
Understanding Cold Outreach: Key Methods & Tips

Learn what cold outreach is, its importance in sales, and explore effective strategies to connect with potential customers.

Read more
Understanding Sales Intelligence: Tools & Trends

Learn what sales intelligence is, its core components, and how it can transform your sales strategy and competitive edge.

Read more
Effective Cold Email Writing Tips & Techniques 2024

Learn how to craft compelling cold emails with clear CTAs, personalization, and strategic follow-ups to boost open rates and replies.

Read more
Lead Enrichment Guide for B2B Sales 2024

Understand lead enrichment and its crucial role in B2B sales for 2024. Learn to improve lead quality and sales outcomes.

Read more
how does bardeen work?

Your proactive teammate — doing the busywork to save you time

Integrate your apps and websites

Use data and events in one app to automate another. Bardeen supports an increasing library of powerful integrations.

Perform tasks & actions

Bardeen completes tasks in apps and websites you use for work, so you don't have to - filling forms, sending messages, or even crafting detailed reports.

Combine it all to create workflows

Workflows are a series of actions triggered by you or a change in a connected app. They automate repetitive tasks you normally perform manually - saving you time.

get bardeen

Don't just connect your apps, automate them.

200,000+ users and counting use Bardeen to eliminate repetitive tasks

Effortless setup
AI powered workflows
Free to use
Reading time
Thank you! Your submission has been received!
Oops! Something went wrong while submitting the form.
By clicking “Accept”, you agree to the storing of cookies. View our Privacy Policy for more information.