
.jpeg)
When you work with Google Sheets, you may need to insert rows into your spreadsheet. Adding one row is simple enough, but what if you want to add multiple rows at once?
Learn how to insert multiple rows in Google Sheets below.
Learn to automatize Google Sheets and save time with Bardeen's Chrome extension.
How to insert multiple rows in Google Sheets from other apps or data sources
Still manually copying data from Salesforce, HubSpot, Notion, or websites like LinkedIn, or Crunchbase?
Bardeen.ai helps you connect Google Sheets with your data sources, so you don’t need to copy and insert data automatically.
Bardeen also connects with ClickUp, Airtable, and 100+ other integrations, and 100+ ready to use websites data scrapers.
How to insert a single row in Google Sheets using the menu
Here’s how to insert a single row in Google Sheets without shortcut:
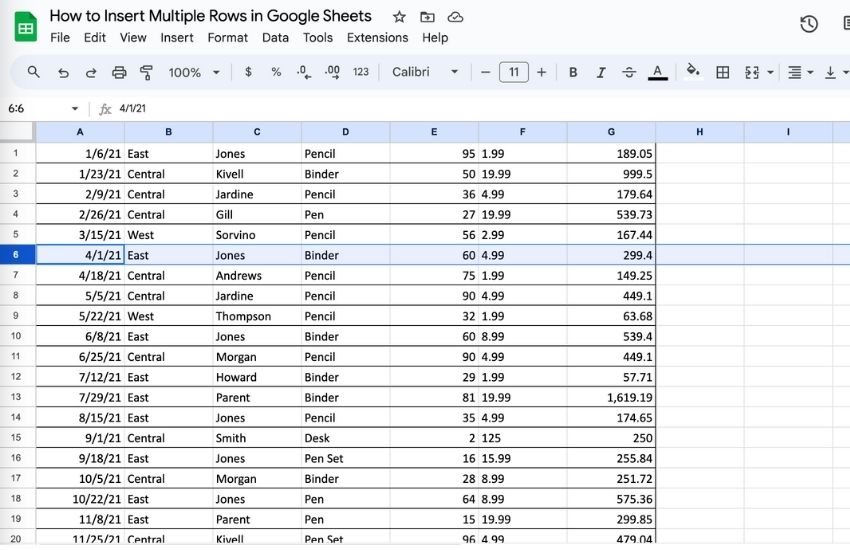
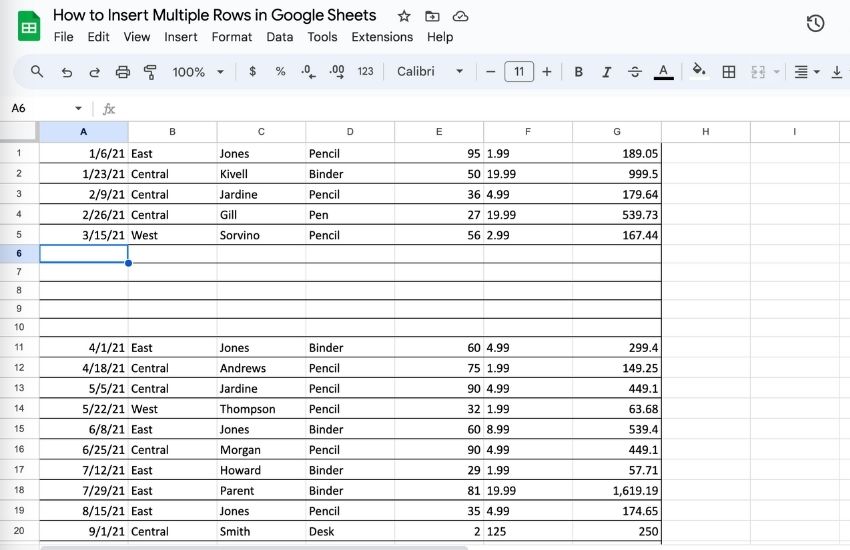
1. Open your Google Sheets spreadsheet.
2. Click the row number of the row above which you want to add your new row. This will select the entire row.
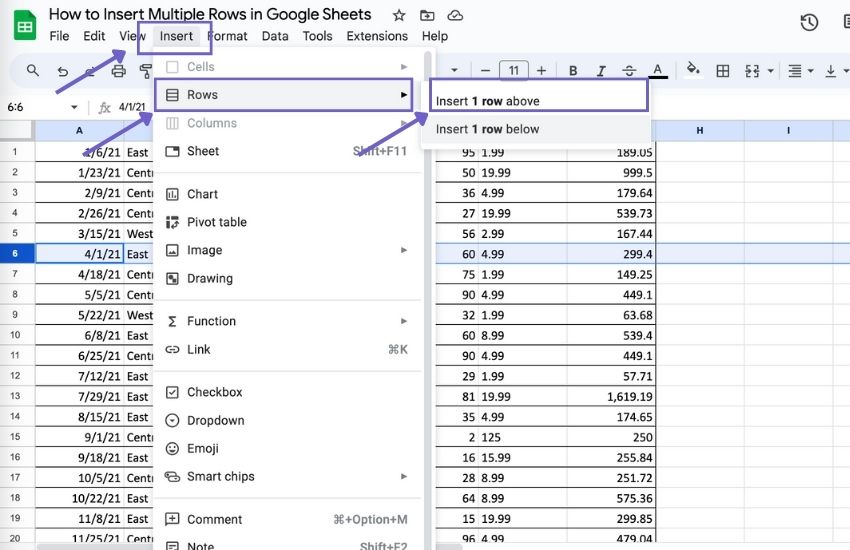
3. Click Insert > Rows > Insert 1 Row Above. Or you can choose to insert 1 row below
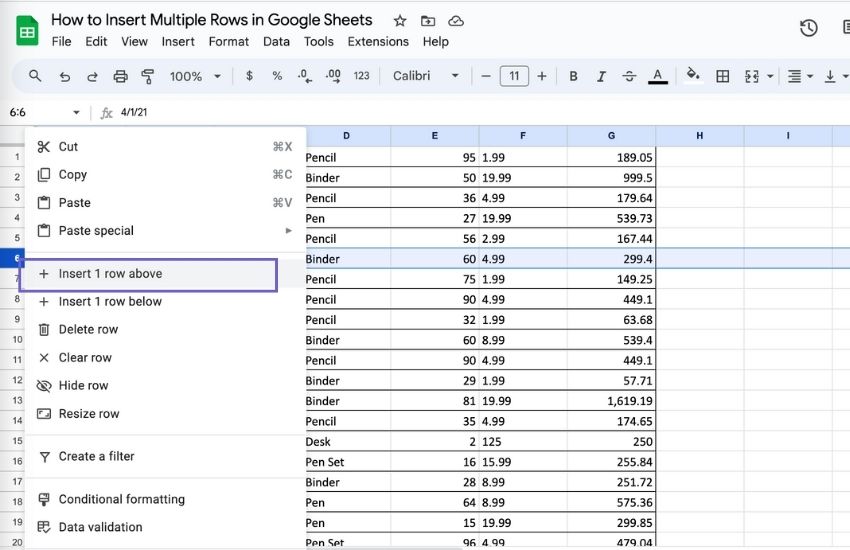
4. Alternatively, right-click in your selected row and click Insert 1 Row Above.
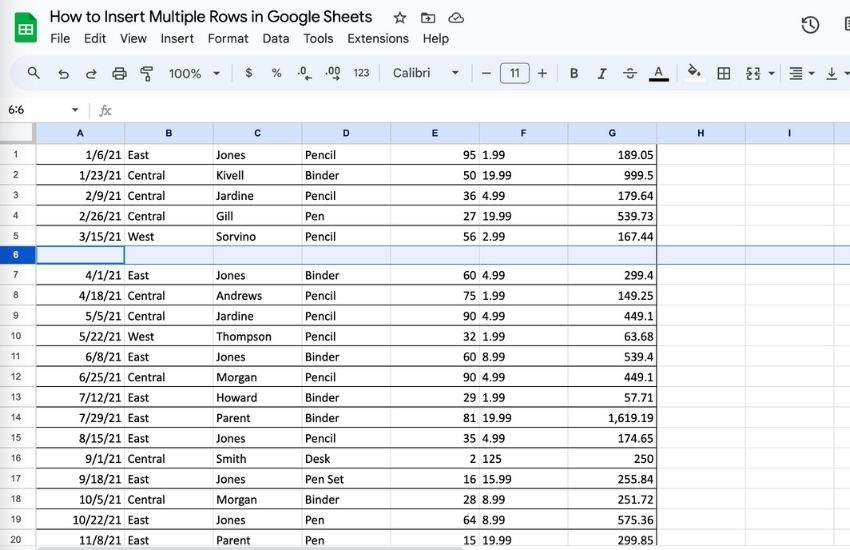
5. The new row will be inserted.
You can also insert a new row below a specific row by choosing the Insert 1 Row Below option.
How to insert a single row in Google Sheets with keyboard shortcuts
Insert a row with shortcuts method 1:
- Press “Shift” and then “Space” to select the entire row above which you want to insert additional rows.
- While holding “Shift” down, press “↓” one time less than the number of rows you need to insert. For example, if you want to add 5 additional rows, you’ll need to press “↓” four times.
- Press “Ctrl”+”Alt”+“=” (for Windows) or “⌘” + “Option” + “=” (for Mac).
Insert a row with shortcuts method 2:
- Select as many cells in a column as the number of rows you want to insert.
- Press “Alt”+”Shift”****+“I” together and then “R” (for Windows) or “Ctrl” + “Option” + “I”, then “R” (for Mac) to insert rows above the cells
- Press “Alt”+”Shift”****+“I” and then “W” (for Windows), ****or “Ctrl”+“Option”+“I”, then “B” (for Mac) to insert rows below the cells
If you use Google Chrome, you only need to press “Alt” + “I”, no “Shift” at this step.
How to insert multiple rows in Google Sheets using the insert menu
Using the method above, you can add as many rows as you wish, but only one at a time. However, there are a couple of ways to add multiple consecutive rows at once.
To insert multiple rows using the Insert menu:
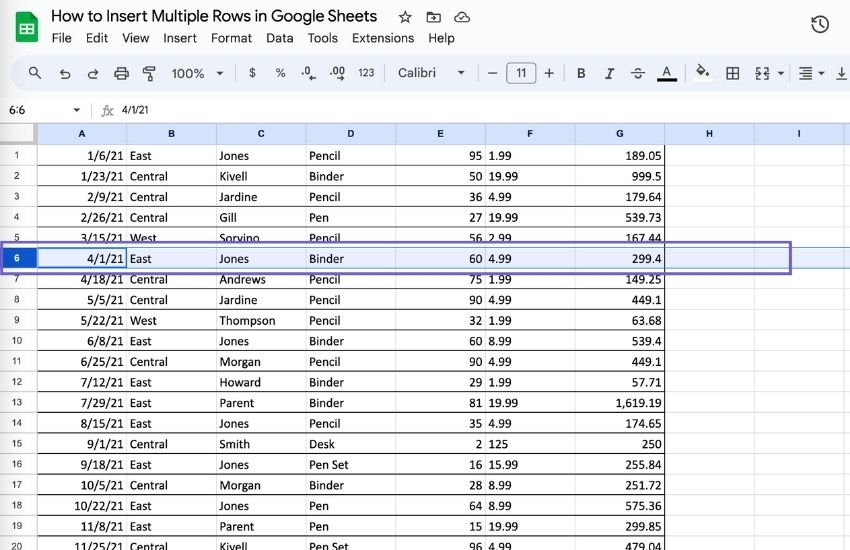
1. Open your Google Sheets spreadsheet.
2. Click and hold on the row number of the row above which you want to insert multiple rows. This will select the entire row.
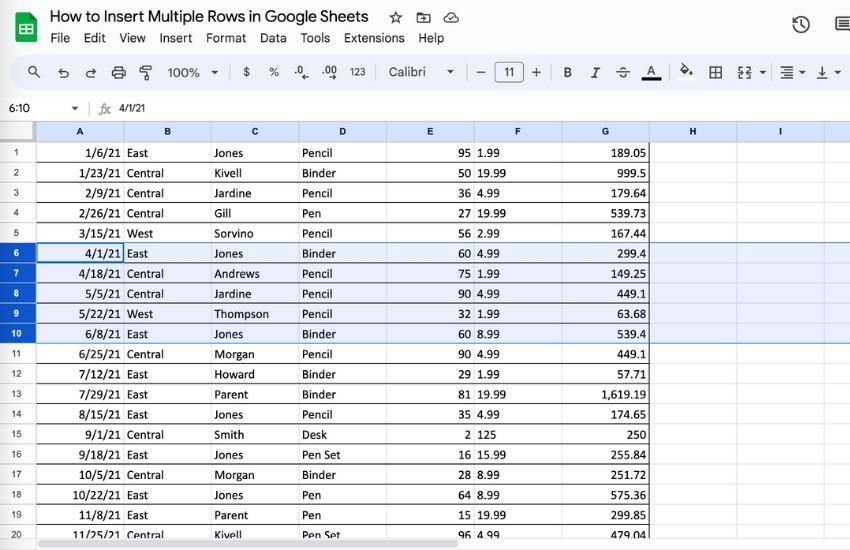
3. To insert multiple rows, first select the number of rows you want to insert by dragging down over additional row numbers below the first row. For instance, if you want to insert 5 rows, select the first row and the next 4 rows, making it a total of 5 rows.
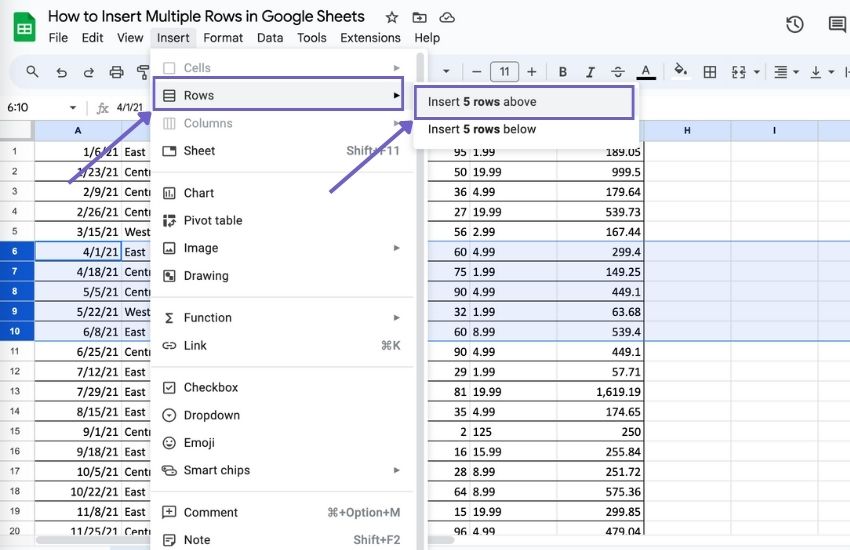
4. Click Insert.
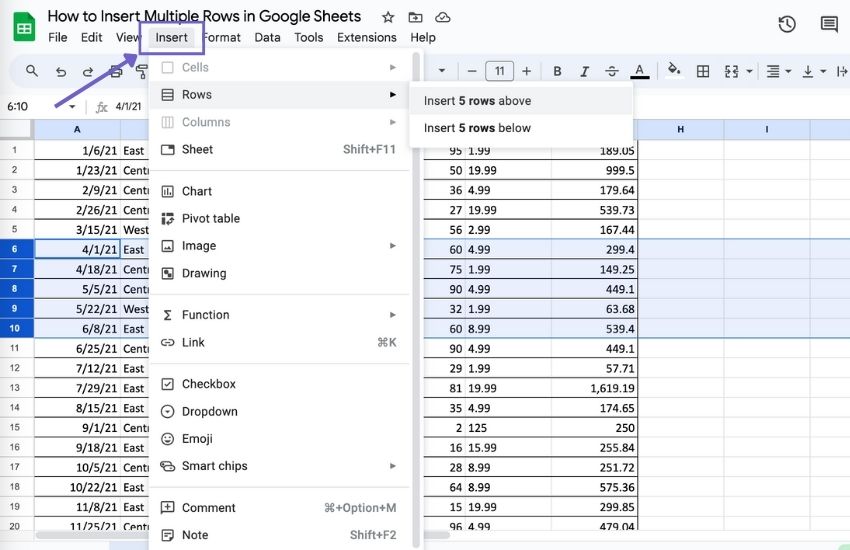
5. Hover over Rows and then click on Insert ‘X’ Rows Above. The value of ‘X‘ will be the number of rows that you selected in step 2.
6. The rows will be inserted.
7. To insert multiple rows below a specific row, choose the Insert ‘X’ Rows Below option.
How to insert multiple rows by Right-Clicking
You can also insert multiple rows by right-clicking a selected row. This is similar to the method above, but the steps are slightly different.
To insert multiple rows in Google Sheets by right-clicking:
1. Open your Google Sheets spreadsheet.
2. Click and hold on the row number of the row above which you want to insert multiple rows. This will select the entire row.
3. Without releasing, drag down over additional row numbers below until you have selected the same number of rows as you want to insert. If you want to insert five rows, for example, select your first row and the next four.
4. Right-click anywhere within your selected rows.
5. Click on Insert ‘X’ Rows Above. Replace ‘X’ with the number of rows selected in step 2.
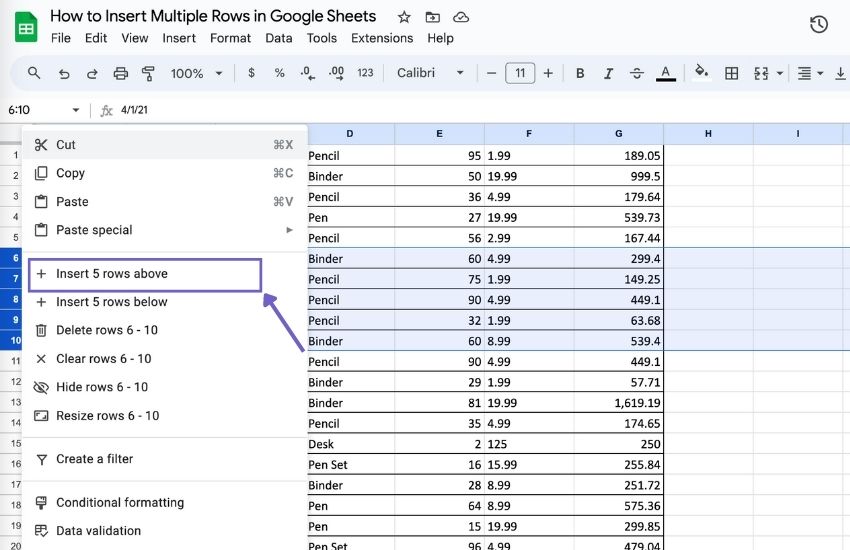
6. The rows will be inserted.
7. You can also insert multiple rows below a specific row by choosing the Insert ‘X’ Rows Below option.
How to insert multiple rows in Google Sheets using shortcuts
The F4 key is a shortcut for repeating your last action, such as inserting a new row above your selected row. This shortcut makes it easier to add multiple rows to non-contiguous rows.
- To insert a row above the fourth row, click on the row header for the fourth row and then select "Insert" from the menu tab.
- To instantly insert a new row above row seven and row nine, click on each row and hit the F4 key.
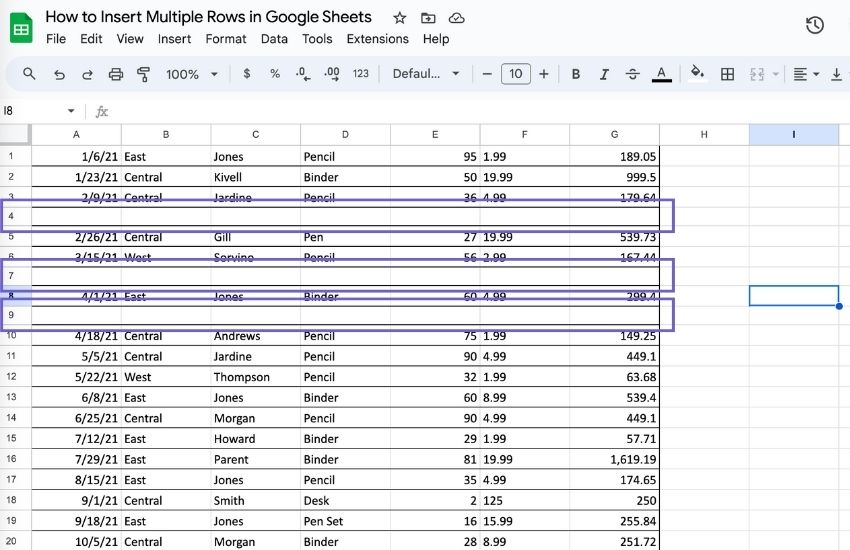
You can use the same shortcut key (F4) on a Mac to insert new rows. This is a quick way to insert multiple rows into non-contiguous rows using a keyboard shortcut. It is much faster than manually selecting each row and adding new ones above.
How to insert multiple rows at the bottom of Google Sheets
By default, a Google Sheets spreadsheet comes with 1,000 rows. If you require additional rows, you can quickly add them to the bottom of your sheet using the following steps:
1. Press Ctrl + Down Arrow on Windows or Cmd + Down Arrow on Mac to navigate to the last row of your sheet.
2. Press the Down Arrow key once more to reveal the option to add more rows.
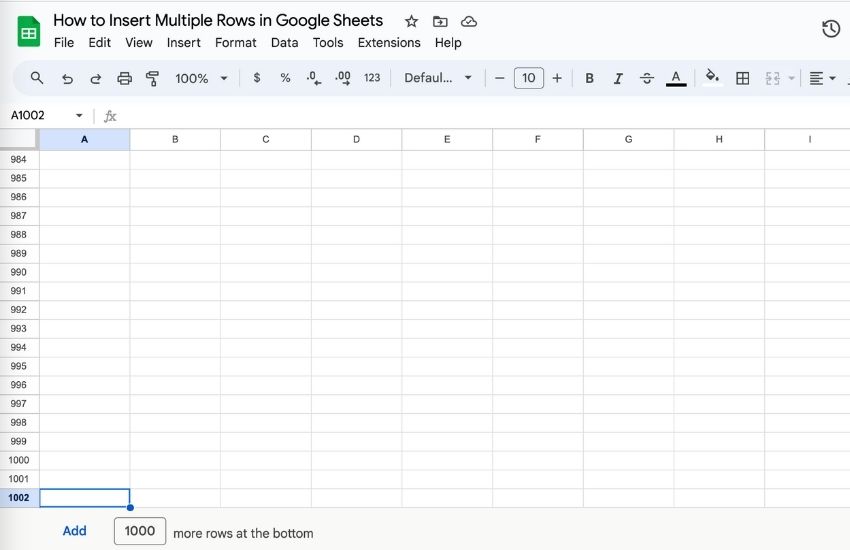
3. Enter a value for the number of rows you wish to add to the bottom of the sheet. You can choose to add between 1 and 5,000,000 rows, but the total number of cells cannot exceed 10,000,000.
4. Click on Add.
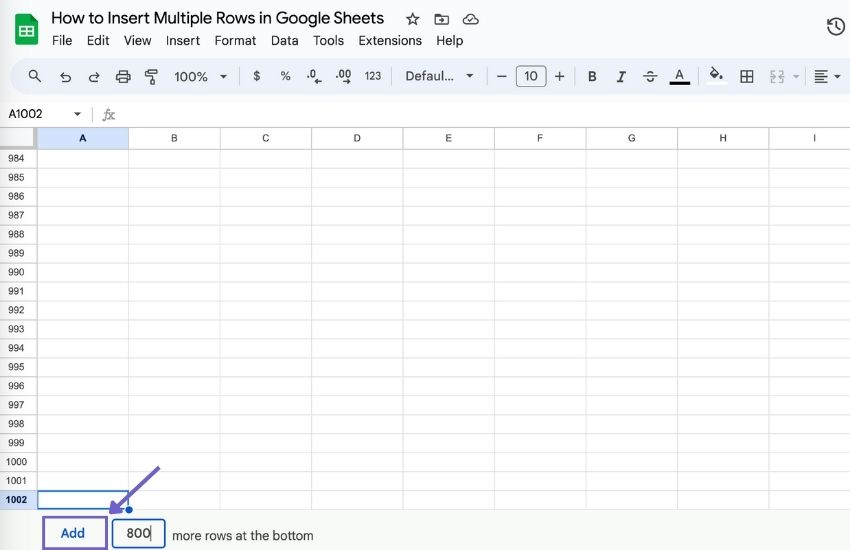
5. The additional rows are instantly added to your spreadsheet. To navigate back to the last cell that contains any data, use the keyboard shortcut Ctrl + Up Arrow on Windows or Cmd + Up Arrow on Mac.
How to insert multiple rows in Google Sheets using Macro
If you want to get more technical with macros, Google Sheets allows you to record and repeat a broader set of actions.
Here's how to use macros to insert multiple rows in Google Sheets:
1. Go to the "Extensions" menu in Google Sheets and select "Macros" > "Record Macro".
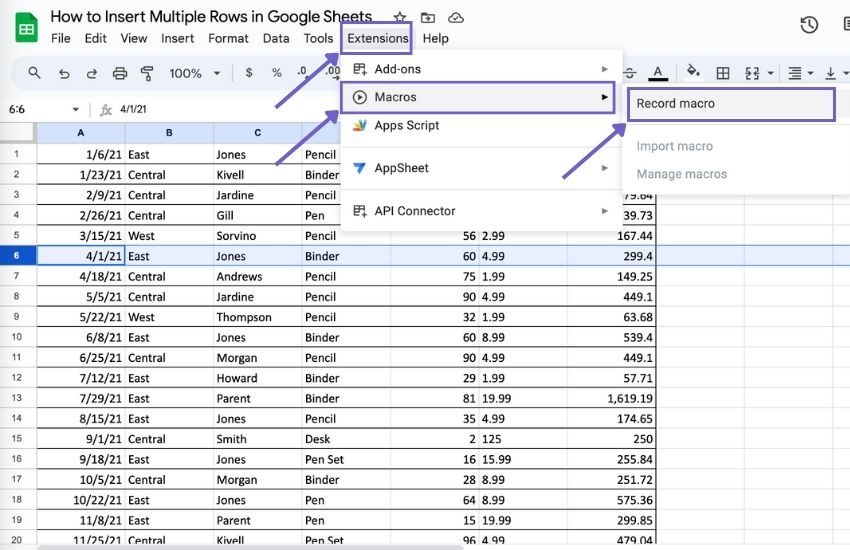
2. A dialog box will appear on your screen to indicate that you are recording a new macro.
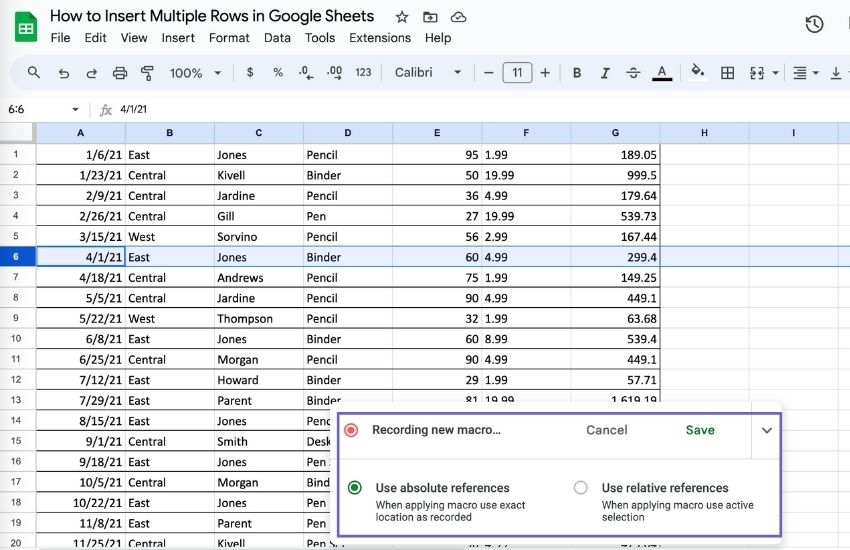
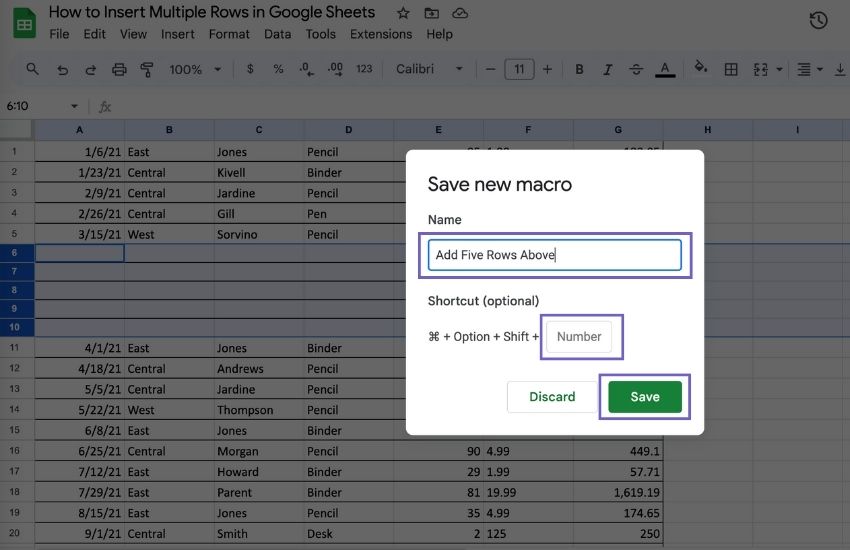
3. If you add rows, macros will record the action. For example, if you add five rows above the ninth row and click Save on the dialog box, the macros will record this action.
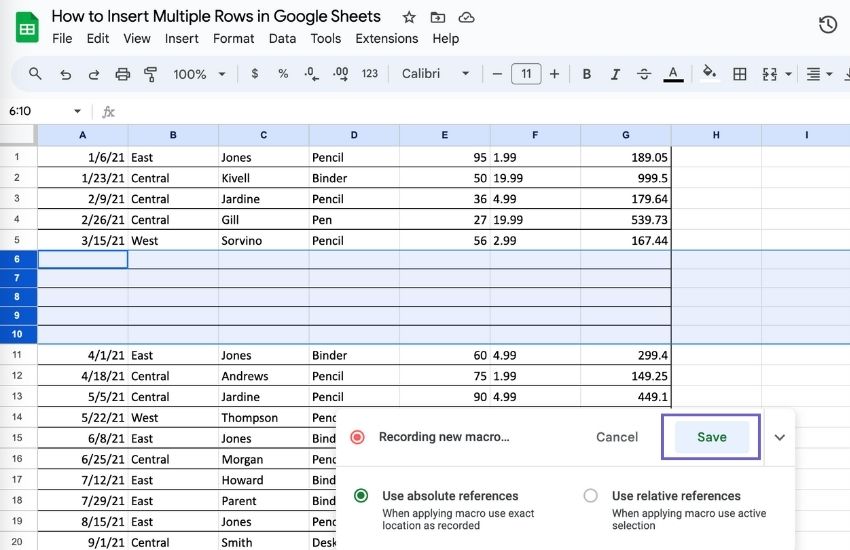
4. Now name your recording. You can also create a shortcut for your recorded action by assigning a number. Click the Save button when you’re done.
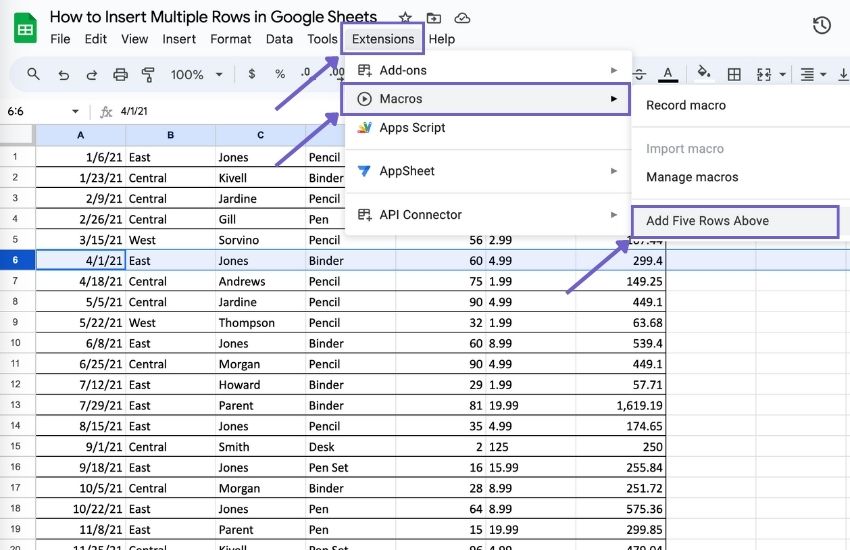
5. To launch your macro, go to the Extensions top menu. Hover over Macros on the drop-down list, and select the recorded action you want to run.
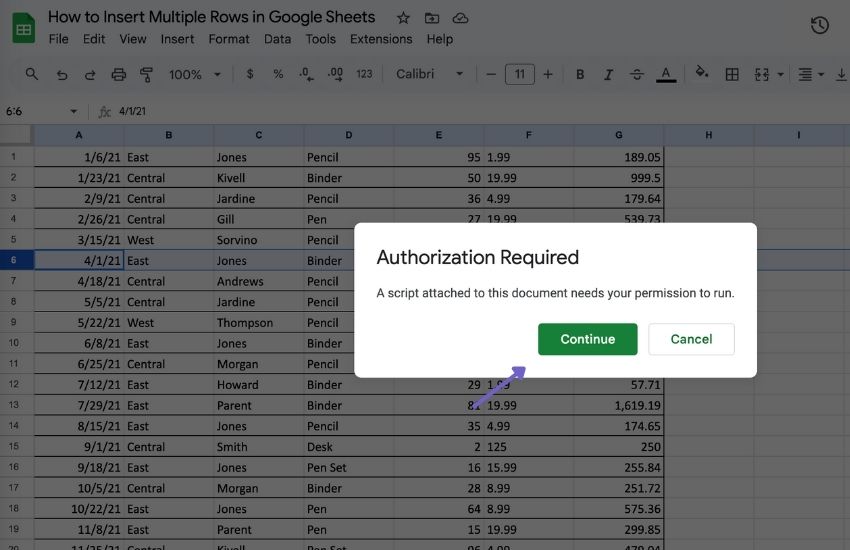
6. Click Continue and follow the prompts to authorize the macro script.
Once you've authorized the script, return to the Extensions tab in the menu and select the macro to run it. Once the script has finished, you'll receive a notification that says "Finished script", indicating that the macro has completed the recorded actions.
In this particular example, five extra rows were added to the spreadsheet. Utilizing macros can streamline the process of adding multiple rows in bulk.
How do I cut multiple rows in Google Sheets with the menu?
Follow the steps below to delete multiple rows in Google Sheets:
- Select the top row in the range of rows you want to delete by clicking on its row number (e.g., 8).
- While holding down the "Shift" key, click on the bottom row number (e.g., 11) in the range.
- Right-click on the selected rows and select "Delete rows X-Y" (e.g., Delete rows 8-11").
The picture below illustrates Step 3 for the case of "Without shortcuts".
How to delete multiple rows without shortcuts in Google sheets
How do I cut multiple rows in Google Sheets with the shortcuts?
Cut multiple rows in Google Sheets with shortcuts - method 1
- Press “Shift” and then “Space” to select the top or bottom row in the rows you want to delete.
- While holding “Shift” down, press “↑” or “↓” and select all rows you want to remove (we assume they are adjacent).
- Press “Ctrl”+”Alt”+ “-” (for Windows) or ”⌘” + “Option” + “-” (for Mac).
Cut multiple rows in Google Sheets with shortcuts - method 2
- Select at least one cell in each row in the range you want to delete. (e.g., cell C3 to cell C8 if you're going to delete Row 3 to 8).
- Press “Alt”+”Shift”****+“E” and then “D” (for Windows) or “Ctrl”+“Option”+“E”, then “D” (for Mac).
- Select “Delete row X-Y”.
If you use Google Chrome, you only need to press “Alt”****+“E” and then “D” (for Windows) or “Ctrl”+“E”, then “D” (for Mac).
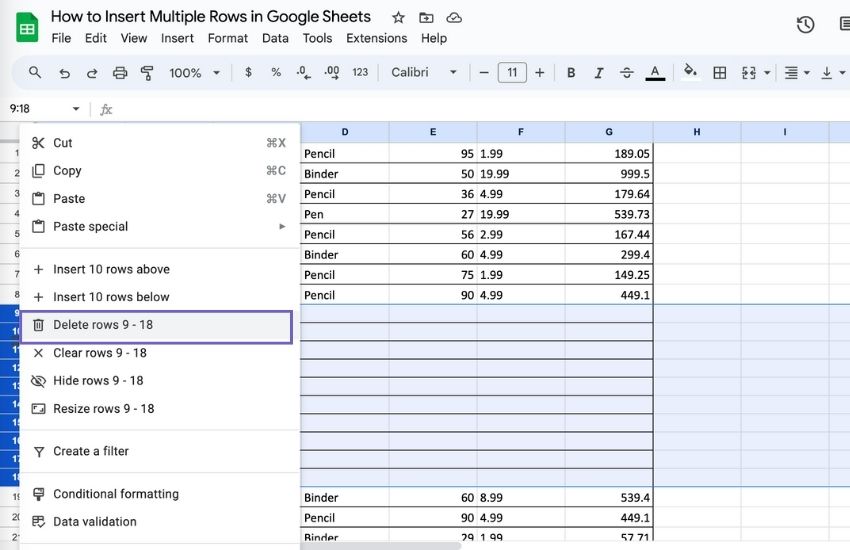
How to delete and clear multiple rows in Google Sheets
Here’s how to remove multiple rows efficiently.
- Select the rows you want to remove.
- Next, right-click and click on "delete".
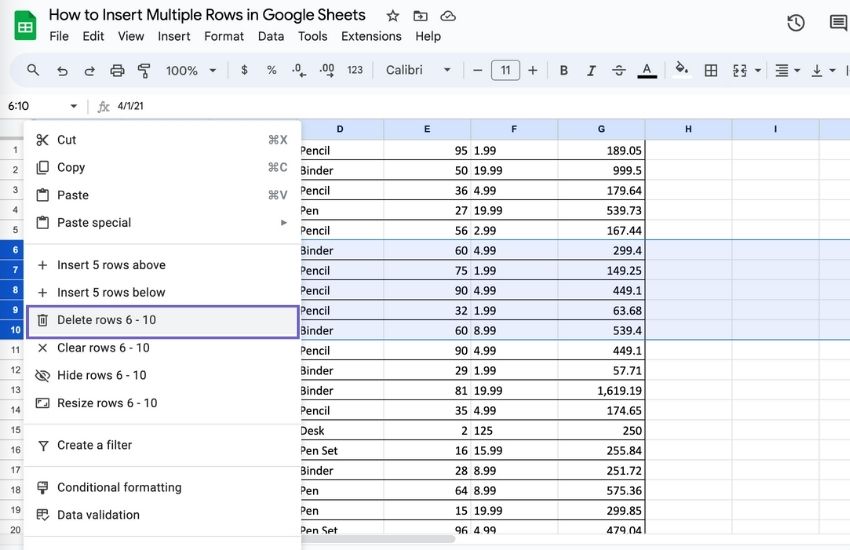
For example, to remove ten blank rows (from nine to eighteen), refer to the table below.
3. To delete selected rows, right-click on them and choose "Delete rows 9-18".
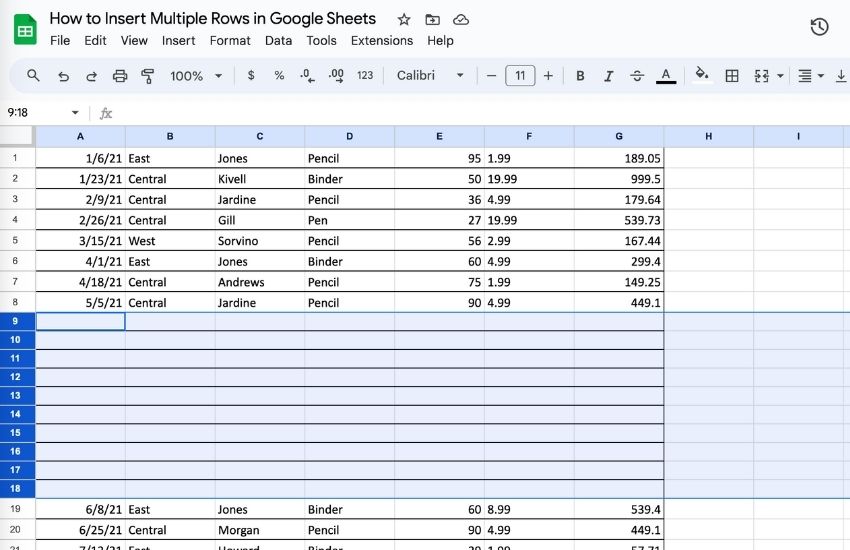
4. If you only want to remove the values or content within your rows without deleting them, select Clear rows 9 – 18.
Summary
In conclusion, inserting multiple rows in Google Sheets can be done in several ways, from using the menu to keyboard shortcuts and macros.
Whether you need to insert just a few rows or hundreds, these methods will help you efficiently manage your data. Additionally, you can streamline the process of adding data to your spreadsheet by using a tool like Bardeen.ai to automatically import data from various sources. With these tips and tricks, you'll be able to work more efficiently and effectively in Google Sheets.
If you're interested in learning more about how to automate and integrate Google Sheets, check out our other articles on using GPT and AI in your Google Sheets, Google Sheet tips and tricks, and best google sheets add-ons.


.jpg)
