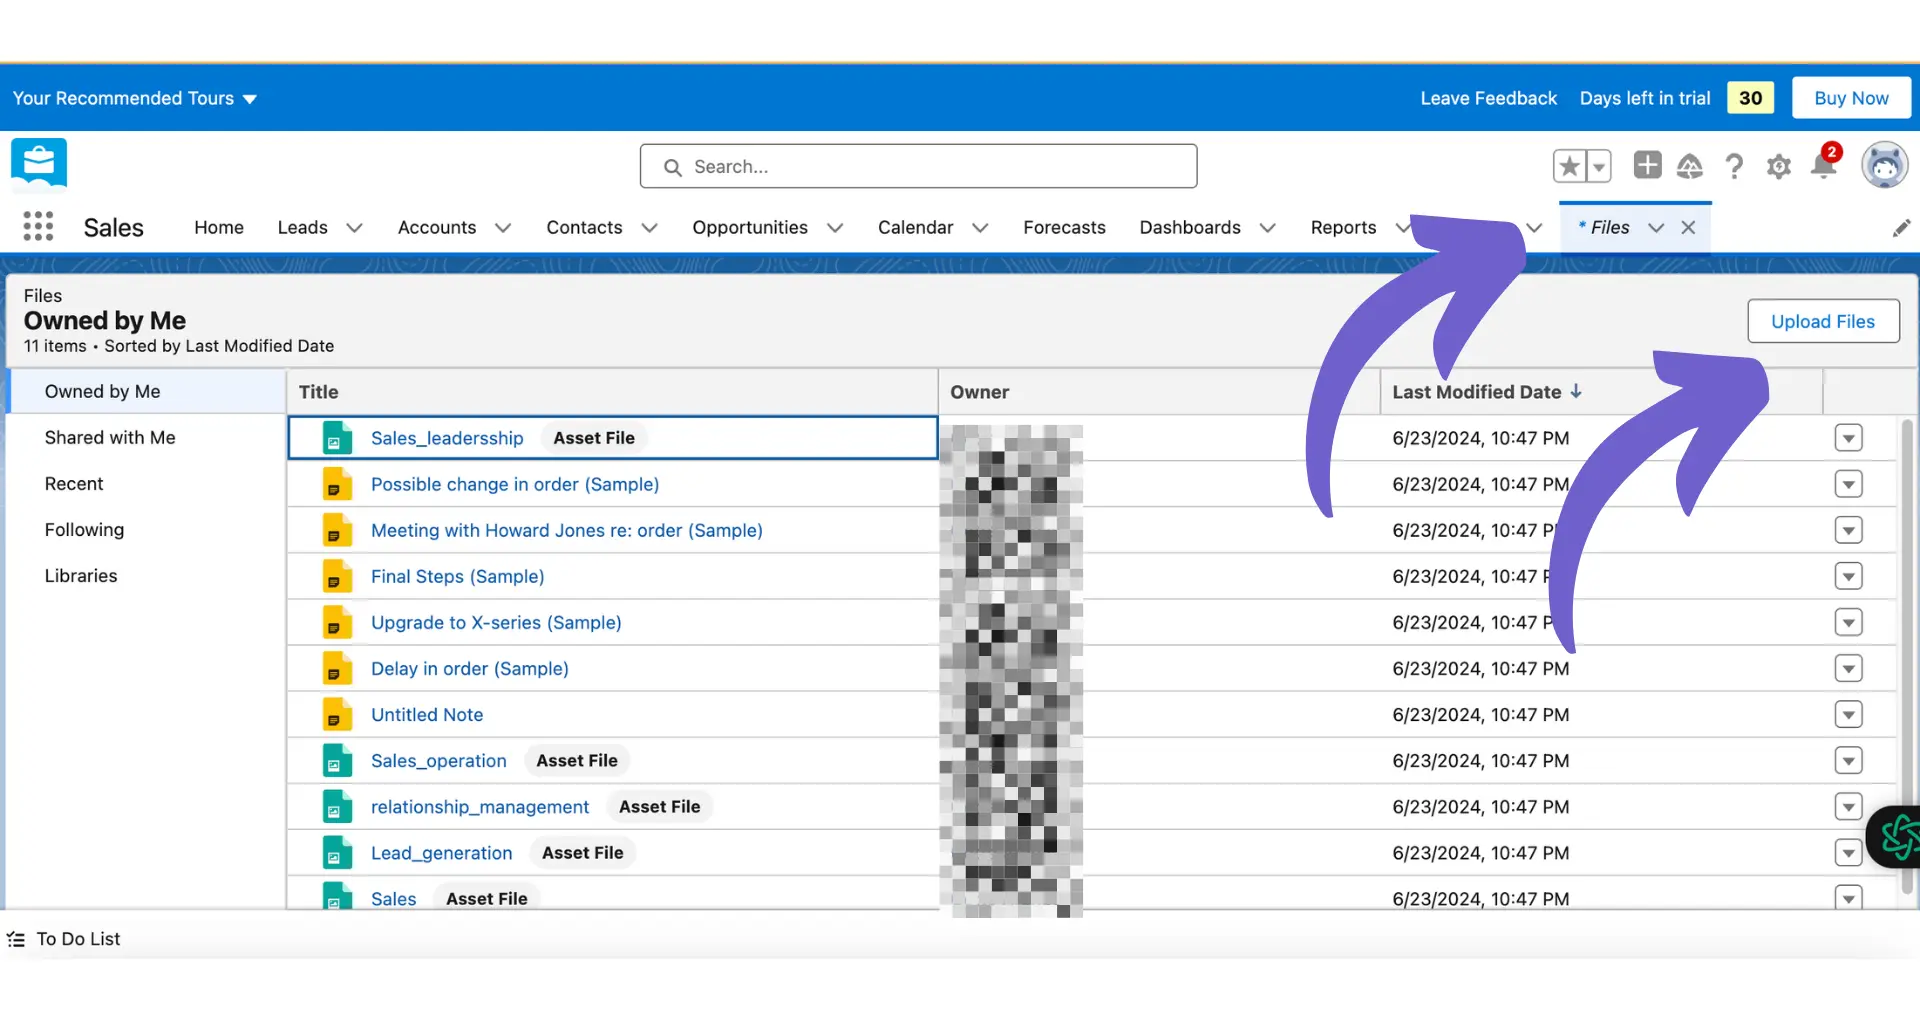
Click Upload, choose an image, and link it to a record.
By the way, we're Bardeen, we build a free AI Agent for doing repetitive tasks.
If you're managing Salesforce, you might love Bardeen's automation tools. They help streamline image uploads and other tasks.
Salesforce Lightning, a modern user interface for Salesforce, offers powerful tools to manage business processes and enhance user experience. Uploading images in Salesforce Lightning is a key functionality that allows users to visually enrich records, making data more engaging and informative. In this step-by-step guide, we'll explore how to efficiently upload images in Salesforce Lightning, covering built-in components, custom solutions, best practices, and troubleshooting tips.

Introduction to Salesforce Lightning and Image Handling
Salesforce Lightning is a modern, intuitive user interface that revolutionizes the way businesses manage their processes and interact with customers. It offers a range of powerful features and tools that help boost productivity and enhance overall user experience. One of the key functionalities of Salesforce Lightning is its ability to handle image uploads, which can significantly improve user engagement and data visualization.
Image uploads play a crucial role in Salesforce applications by:
- Enhancing visual appeal and user interaction
- Providing a more engaging and informative user experience
- Enabling users to easily associate images with records, such as product photos or customer profiles
- Facilitating better data visualization and analysis

By leveraging the image upload capabilities in Salesforce Lightning, businesses can create more visually appealing and interactive applications that drive user adoption and improve overall efficiency. Learn more about lead enrichment to enhance your data.
Using the Built-in Lightning File Upload Component
Salesforce Lightning provides a built-in component called lightning-file-upload that simplifies the process of adding image upload functionality to your Salesforce records. This component offers a user-friendly interface for selecting and uploading files, with customizable settings to control the types of images allowed.
To use the lightning-file-upload component:
- Add the component to your Lightning page or component using the
<lightning-file-upload>tag. - Set the
record-idattribute to the ID of the Salesforce record you want to associate the uploaded images with. This ensures the images are linked to the correct record. - Configure the
accepted-formatsattribute to specify the allowed image file types, such as.jpg,.png, or.gif. This helps restrict uploads to only the desired image formats. - Optionally, customize the component's label using the
labelattribute to provide clear instructions or guidance to users.
Here's an example of how to implement the lightning-file-upload component in your Lightning component:
<lightning-file-upload label="Upload Product Images" name="fileUploader" accept=".jpg, .png, .gif" record-id="{productId}" onuploadfinished="{handleUploadFinished}" multiple></lightning-file-upload>
In this example, the component is configured to accept .jpg, .png, and .gif image files, and the uploaded images will be associated with the record specified by the productId variable. The onuploadfinished attribute is used to specify a JavaScript function that will be called when the image upload is complete, allowing you to handle the uploaded files and perform any necessary post-upload actions.
By leveraging the lightning-file-upload component, you can quickly add image upload capabilities to your Salesforce Lightning applications, providing a seamless experience for your users.
Save time by using Bardeen to integrate Google Drive with other apps. Automate file organization and keep your data up-to-date effortlessly.
Customizing Image Uploads with Lightning Web Components (LWC)
While the built-in lightning-file-upload component provides a quick and easy way to add image upload functionality to your Salesforce Lightning applications, there may be cases where you need more control over the upload process or want to customize the user interface. In such scenarios, you can create a custom Lightning Web Component (LWC) for image uploads.

To create a custom LWC for image uploads:
- Create a new LWC using your preferred development environment, such as Visual Studio Code or the Salesforce Extensions for VS Code.
- In the LWC's HTML file, add the necessary markup for the file input and any additional UI elements you want to include, such as buttons or progress indicators.
- In the LWC's JavaScript file, implement the logic to handle the file selection and upload process. You can use the
FileReaderAPI to read the selected file and convert it to a base64-encoded string. - Use the
@wiredecorator orimperativeApex method calls to send the file data to an Apex controller for further processing and storage.
Here's an example of a custom LWC for image uploads:
<!-- HTML -->
<template>
  <div class="slds-m-around_medium">
    <input type="file" accept=".jpg, .png, .gif" onchange={handleFileChange} />
    <button onclick={handleUpload}>Upload</button>
  </div>
</template>

<!-- JavaScript -->
import { LightningElement } from 'lwc';
import uploadFile from '@salesforce/apex/FileUploadController.uploadFile';

export default class CustomImageUpload extends LightningElement {
  selectedFile;

  handleFileChange(event) {
    this.selectedFile = event.target.files[0];
  }

  handleUpload() {
    const reader = new FileReader();
    reader.onloadend = () => {
      const fileContents = reader.result.split(',')[1];
      uploadFile({
        fileName: this.selectedFile.name,
        base64Data: fileContents,
        recordId: this.recordId
      })
        .then(result => {
          console.log('File uploaded successfully');
        })
        .catch(error => {
          console.error('Error uploading file:', error);
        });
    };
    reader.readAsDataURL(this.selectedFile);
  }
}
In this example, the LWC uses a file input field to allow users to select an image file. When the user clicks the "Upload" button, the handleUpload method is called, which reads the selected file using the FileReader API, converts it to a base64-encoded string, and sends it to the uploadFile Apex method along with the file name and record ID.
The Apex controller (FileUploadController) handles the server-side processing of the uploaded file, such as creating a ContentVersion record and associating it with the specified Salesforce record using a ContentDocumentLink.
By creating a custom LWC for image uploads, you have full control over the user interface and can implement additional features like file validation, progress tracking, and error handling to enhance user experience.
Best Practices for Image Management in Salesforce
To ensure optimal performance and maintain a well-organized system when working with images in Salesforce, consider the following best practices:
- Optimize image sizes: Before uploading images to Salesforce, resize and compress them to reduce file sizes. Large image files can slow down page load times and consume unnecessary storage space. Aim for a balance between image quality and file size.
- Use appropriate file formats: Stick to widely supported image formats like JPEG, PNG, and GIF. These formats offer good compression and compatibility across different devices and browsers. Avoid using less common or proprietary formats to ensure accessibility for all users.
- Implement a naming convention: Establish a consistent naming convention for your image files to make them easily searchable and identifiable. Include relevant keywords, dates, or record IDs in the file names to help users quickly locate the desired images.
- Organize images in folders: Create a logical folder structure within Salesforce to categorize and organize your images. Use descriptive folder names that reflect the purpose or content of the images they contain. This makes it easier for users to navigate and find the images they need.
- Set appropriate access controls: Manage access to images by setting the right permissions and sharing settings. Ensure that only authorized users can view, upload, or modify images based on their roles and responsibilities. This helps maintain data security and prevents unauthorized access to sensitive visual content.
- Regularly review and clean up: Periodically review your image library and remove outdated, duplicate, or unused images. This helps keep your Salesforce org clean and reduces clutter. Consider implementing a retention policy to automatically delete old images after a specified period.
Save time by using Bardeen to integrate Dropbox with other apps and manage your image files seamlessly.
By following these best practices, you can optimize the performance of your Salesforce org, ensure a well-organized image library, and provide a better user experience when working with visual content. For more tips, explore sales prospect list building and other resources.
Troubleshooting Common Issues with Image Uploads in Salesforce
When uploading images in Salesforce Lightning, users may encounter various issues. Here are some common problems and their solutions:
- Insufficient permissions: If users receive an error message stating they don't have the necessary permissions to upload images, administrators should review and adjust the user's profile or permission set. Ensure the user has the appropriate permissions for creating and modifying records related to image uploads.
- File size limitations: Salesforce has file size limits for image uploads. If users attempt to upload an image that exceeds the maximum allowed size, they will receive an error message. To resolve this, users should resize or compress the image to meet the file size requirements before attempting to upload again.
- Unsupported file formats: Salesforce supports specific image file formats, such as JPEG, PNG, and GIF. If users try to upload an image in an unsupported format, they will encounter an error. Users should convert the image to a supported format using an image editing tool before uploading.
- Reaching storage limits: Each Salesforce org has a limited amount of storage space for files, including images. If users receive an error indicating that the storage limit has been reached, they should review and delete unnecessary files or consider purchasing additional storage. Administrators can monitor storage usage in the Salesforce setup area.
- Record ID mismatch: When using the
lightning-file-uploadcomponent or a custom LWC, users must ensure that the correct record ID is specified for the upload. If the record ID is missing or incorrect, the image upload may fail. Double-check the record ID and ensure it matches the intended record.
If the issue persists after trying these solutions, users should consult the Salesforce Help documentation or reach out to Salesforce support for further assistance. Administrators can also review the Salesforce error log to gather more details about the specific error message and troubleshoot accordingly.
Automate Your Salesforce Workflow with Bardeen
Uploading images to Salesforce Lightning can be streamlined significantly with automation, bypassing manual processes and enhancing efficiency. Specifically, for Salesforce users, automating image uploads and related tasks can save a tremendous amount of time and ensure data integrity. Bardeen provides several playbooks that can automate various Salesforce operations, making it easier to manage your CRM data effectively.
Here are some examples of how Bardeen can automate processes in Salesforce:
- Create a new Salesforce opportunity: This playbook enables the automatic creation of new sales opportunities within Salesforce, streamlining your sales pipeline management.
- Create a new Salesforce contact: Automate the addition of new contacts into Salesforce directly, ensuring your CRM is always up-to-date with the latest client information.
- Create a Salesforce lead from a LinkedIn profile: This playbook allows for the seamless creation of Salesforce leads from LinkedIn profiles, enhancing your lead generation process through automation.
These playbooks are designed to automate and simplify your Salesforce tasks, allowing you to focus more on strategic activities rather than manual data entry. Start automating your Salesforce operations today by downloading the Bardeen app.


.svg)
.svg)
.svg)
